
How Can I Create My Pokemon Overworld Maps On Apple iPhone XS Max? | Dr.fone
How Can I Create My Pokemon Overworld Maps On Apple iPhone XS Max?
Pokemon Go is a location-based augmented reality game that encourages players to explore their surroundings. While the game is fun, it can be challenging to find Pokemons, Pokestops, and Gyms in your area. To make things easier, you can create your Pokemon Go overworld maps on Apple iPhone XS Max. This way, you can easily find the locations of Pokemons, Pokestops, and Gyms in your area.
You have all the reasons to draw your map and follow the paths. The joy of playing Pokemon rests on walking through various towns and exploring different cities. Perhaps there are routes you have visited severally and you now want to go a different direction. Again, you may want to visit a corner where you will get as many different characters as possible. Let’s unleash possible route creators for your map.
Part 1. Why Opt for Pokemon Go Location Maps?
Pokemon Go location map is very useful when you are playing Pokemon Go.
- 1.It will help you to calculate your moves. You wouldn’t want to embark on a journey where you have no clue of the route.
- 2.The map will guide you to know where a raid is taking place or where Pokemon Go gym is located. You will always stay ahead of the game.
- 3.You also need to be ready for any eventuality. The map will let you know about any Pokestop locations so you can beef up your rescue items like Pokeballs.
- 4.It will be easy to find any recent Pokemon locations in Go. You can follow them and catch them up before they see you.
Part 2. Create a Pokemon Go Map using WordPress Google Maps
With WordPress Google Maps, you can create custom maps with high-end markers, proper descriptions, and links. Follow these steps to create your Pokemon Go map.
- 1.First, download WP Google Maps from your WordPress site.
- 2.Next, purchase and activate the ‘WP Google Maps Pro’ version. The upgraded version is what allows the adding of categories, markers, directions, and other features.
- 3.Use the available plugin to create your ‘Pokemon Go Map’. You can also choose and add PokemonGo Map themes.
- 4.Then, go to ‘Maps’ section and select the ‘Categories’ option. Next, create marker categories for gyms and PokeStops. You can now add your PokeStops and Gyms at the ‘Map Editor’.

Part 3. Create and Visit Pokemon Stops at any Location by Spoofing your Apple iPhone XS Max’s GPS
Once you create Pokestop maps, you can now check the location with the best gpx map creator for Pokemon Go – Dr. Fone Virtual Location. It lets you fake the location of Pokestops anywhere you wish to go and visit them remotely. Follow these steps to spoof the location of your Apple iPhone XS Max anywhere in the world with Dr. Fone Virtual Location.
Step 1. Connect your Apple iPhone XS Max
Ensure you have first noted the address of the Pokestop before you embark on visiting it. To continue, connect your Apple iPhone XS Max to your computer then open Dr.Fone toolkit. Next, select which Virtual Location module to use and hit the ‘Get Started’ button.


Step 2. Choose your target location
Wait for your Apple iPhone XS Max to be connected and then key in the required details of the location you have in mind. Next, click on the ‘Teleport Mode’ icon located at the top-right corner of the screen. Then enter the details of the location you want to visit in the search bar. You can also use its coordinates.

Step 3. Spoof your Apple iPhone XS Max device’s location
You should now be ready to go virtual. Once you spoof your device’s location, you can adjust the pin on the map. Use the ‘Move Here’ button to spoof your phone’s location.

Step 4. Draw a map
The spoofed location will be the ‘Start’ point of your route. Now, use one-stop or multi-stop modes to simulate the movement of your Apple iPhone XS Max by drawing a route on the map. Also, choose at what speed you want to walk. If you want to be realistic, make use of this Pokemon map creator’s GPS joystick to fully accomplish your mission.

Conclusion
Creating Pokemon overworld maps is a paramount step to playing Pokemon Go. This will help you stay ahead of the game and learn how to calculate your moves. One way is to use WP Google maps. However, you will need to upgrade to the Pro version to unleash the hidden gems. You can also opt for a reliable route creator to easily draw your route and spoof iPhone. Dr. Fone Virtual Location works in simple steps to fake the GPS location of choice and let you explore the world from the comfort of your room.
Why can’t I install the ipogo On Apple iPhone XS Max
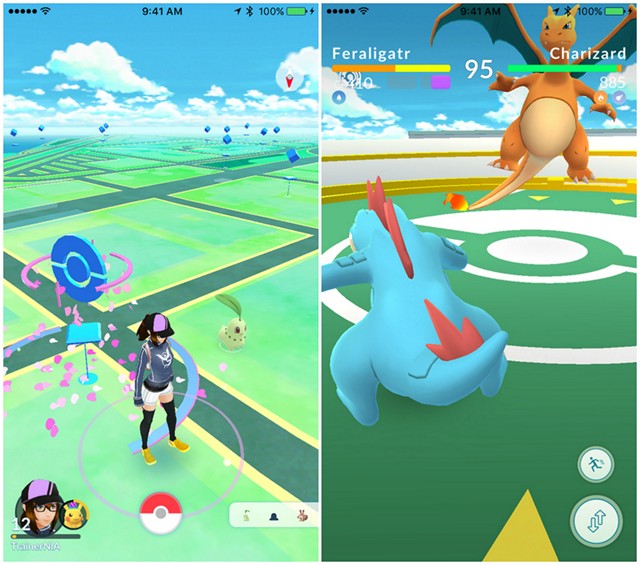
For tweaking the official Pokemon Go app right there in AppStore, iPogo is a choice to have. But sometimes iPogo can’t install, and users face a lot of difficulties. At that moment, some users feel furious and look forward to the solutions to get rid of it. If you also hit in the same category, you are on the right page. Let’s discuss it more and look forward to the solution that will help you to install it again.
Part 1: Reasons that you can’t install the ipogo
There are multiple reasons that contribute to the difficulty when you can’t install the iPogo. Some of them are as follows:
- iPhone version:
The current iPhone version you are choosing may be responsible for the problem for iPogo can’t install. It is important to have iOS version 13. It works on all the known jailbreak devices having the same iOS. In case you have upgraded the iOS 13 to iOS 14, the chances are quite less to use it.
- iPogo version:
iPogo version is also an important factor of consideration. Time to time regular updates keep coming, and if you are stuck on the previous version, you will not be able to use it. Sometimes the iPogo is down whenever there is an update, and when you try to update it, the problem arises. At that moment, you need to be patient and try re-installation.
- Direct download method:
If a user is considering direct downloading method, they might also face this trouble because Apple now targets certificate. Now you need to create your certificate with the help of a computer or a paid service like Signulous and others.
Bonus: Simple steps to install iPogo
To install iPogo, we suggest you avoid the direct download method and instead follow the steps to follow with “Matrix installer.”
Steps to follow:
Step 1: Upgrade the iTunes version of your computer to latest version.
Step 2: Now remove the original app from your iDevice.
Step 3: Get IPA from the website download and save it.
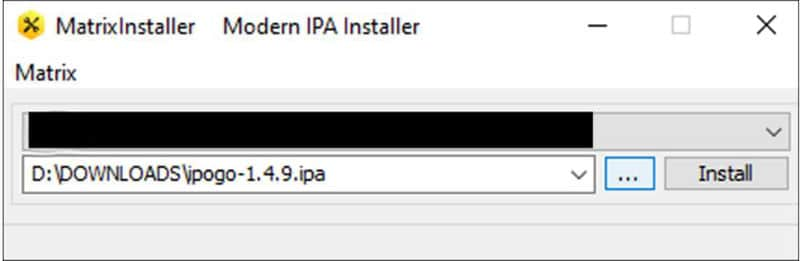
Step 4: Launch the “Matrix Installer”.
Step 5: With the help of USB cable connect your Apple iPhone XS Max to the PC.
Step 6: Let the installer to detect the iDevice.
Step 7: Now click on “Device” then “Install Package” option.
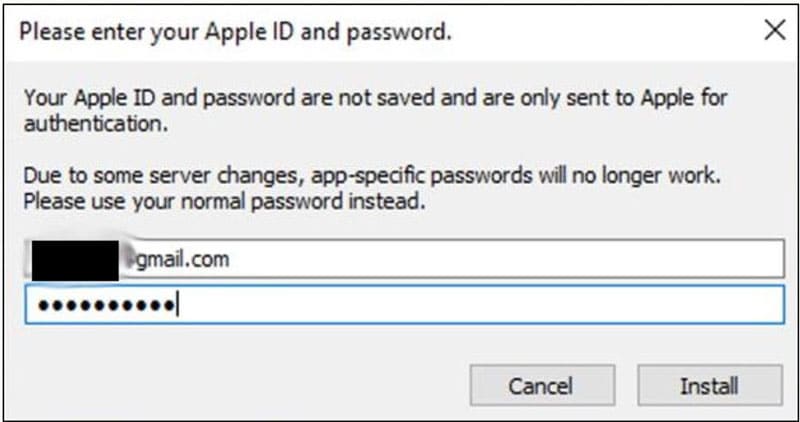
Step 8: Now the installer asks for the Apple ID username, and Password mentions the same. Make sure these are the ones used to fetch the developer certificate from the Apple Server. (We suggest you create a new Apple ID)
Step 9: Be patient for a while and let the impact or to perform all the work.
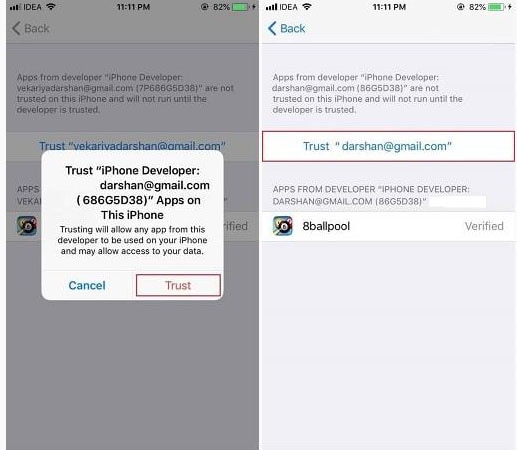
Step 10: “Complete” message will appear and unlock your Apple iPhone XS Max Screen and move to “settings->General-> device management.”
Step 11: Now hit on the developer Apple ID and trust it.
Part 2: Risk of installing ipogo and running
You can come across a certain risks also when you are installing and running iPogo. These are as follows:
Jailbreaking is required:
For using iPogo, jailbreaking is required, and it refers to the privilege to Apple devices through which they can remove all the software restrictions. If there is any loss to the data, a user will be responsible for it.
Chances to get banned:
iPogo is an application that can be used after jailbreaking only. After doing the jailbreaking, the chances are there that your device might get banned. You are at a high risk where certain problems may arise.
Can lose access to content:
There might be a chance you have will lose access to content as well. Therefore we suggest you avoid. If you still want to jailbreak your device and want to install iPogo, it is entirely your choice.
Part 3: is there a software like iPogo without jailbreak?
If you are wondering about the same question, then the answer is “Yes”. Dr.Fone Virtual Location is an iOS location changer helping you to enjoy the same features without any hassle. This application will help you to simulate GPS movement along real road or paths you draw. A user can also integrate joystick to make the movement of GPS effortless. It helps you to teleport iPhone GPS to anywhere in the world. The best part is it supports up to five device location management at a time.
Let us understand how this tool can help you spoofing your location.
We are mentioning the steps which will help you to teleport to anywhere in the world. The steps for it are as follows:
Step 1: Get the tool on PC
Start with downloading Dr.Fone Virtual Location on your PC using the official website. And then install it. Once done, launch the program. Now hit on “Virtual Location” from all the options and connect your Apple iPhone XS Max to the computer.

Step 2: Get the Apple iPhone XS Max device Connected
You now need to get your iPgone plugged with PC via a USB cord. Once you do this, simply click on “Get Started.”
Step 3: Check Location Accuracy
A new window will appear indicating the actual location on the map. If the location does not appear to be accurate hit on “Centre on” icon at the lower right part to get an accurate location.
Step 4: Turn on Teleport Mode
By clicking on the Corresponding icon in the upper right activates “Teleport Mode”. Now mention the place you want to teleport in the upper left field. Click “Go” (consider a Rome in Italy as an example)
Step 5: Start Spoof
After selecting it, the system will understand the desired place in Rome and hit on “Move here” in the popup box.
Finally, the location has been changed to Rome now. Whatever you do whether you click on “centre on” icon or try to relocate yourself on iPhone ROM is the fixed location that will appear, and in all the location app as well Rome is the fixed place.
Conclusion
Here, we have agreed to do to the conclusion that if iPogo won’t install there is nothing for you to worry about because certain other solutions are there that help you to switch the locations without any hassle.
Latest way to get Shiny Meltan Box in Pokémon Go Mystery Box On Apple iPhone XS Max
The news of every Pokémon Go player being able to shift to Pokémon Home was taken in with a flavorsome acceptance from the community of trainers. Home Event for the highly successful mobile game is advancing towards termination, and this has ensued in reckless people demanding to know ways to get a Mystery Box so they can acquire a Shiny Meltan.
Part 1: How to get a mystery box in Pokémon Go?
The Mystery Box is a particular object in Pokémon Go that briefly roots the mythical Pokémon Meltan to emerge in the wild. To receive a Mystery Box in the game, you should connect your Pokémon Go and Home accounts in the first place. Furthermore, you should relocate one Pokémon Go character at the very least to Home to attain a Mystery Box that can entice Shiny Meltan.

Reportedly, you are required to have the mobile version of Home connected to your Nintendo Account. This can be carried out simply by downloading the Home app from Your Apple iPhone XS Max store and tracking the instructions given on your screen in the initialization process of your app. After connecting the mobile Home application to your Nintendo account, track the steps below to connect Pokémon go to Home App:
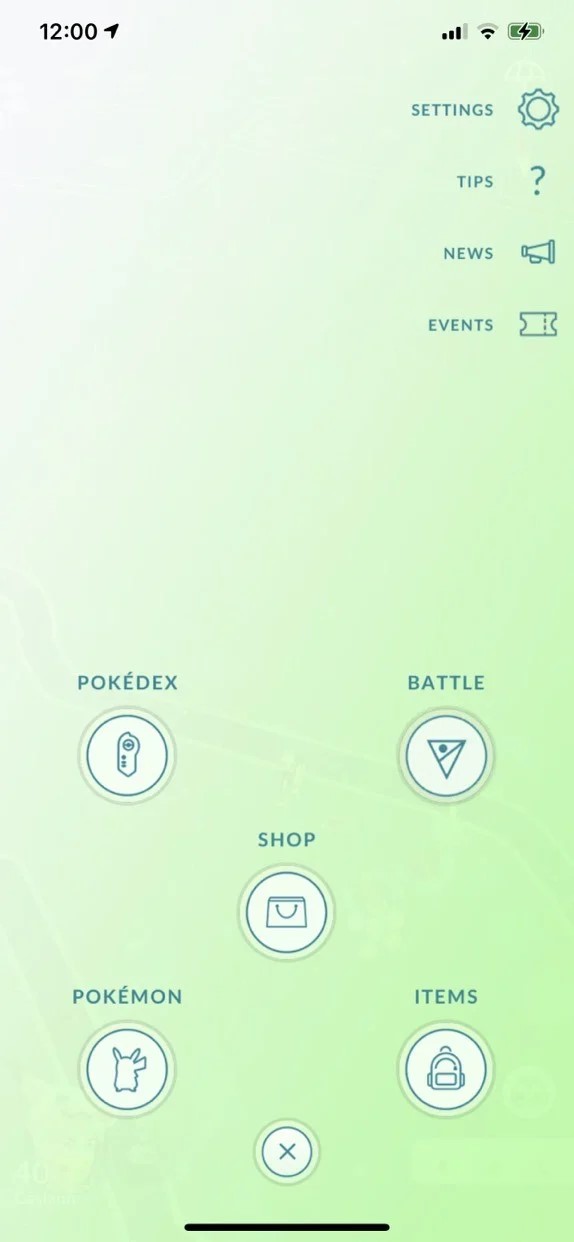
- Start Pokémon Go.
- Click the PokeBall icon on the map at the bottom.
- Advance to ‘Settings’ and scroll downwards and click Pokémon Home
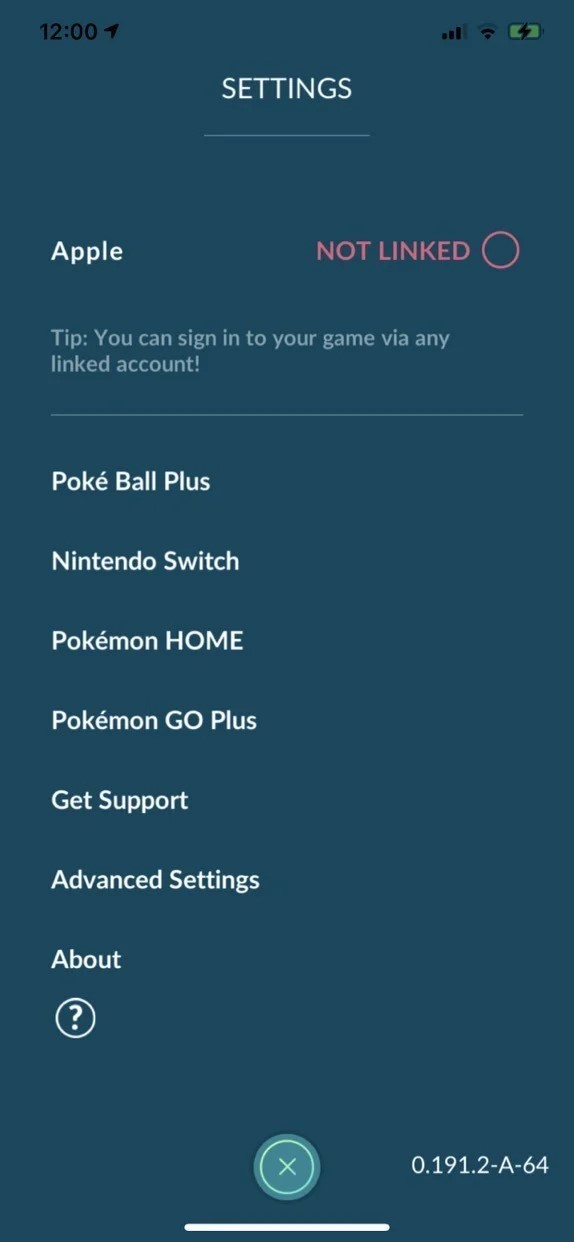
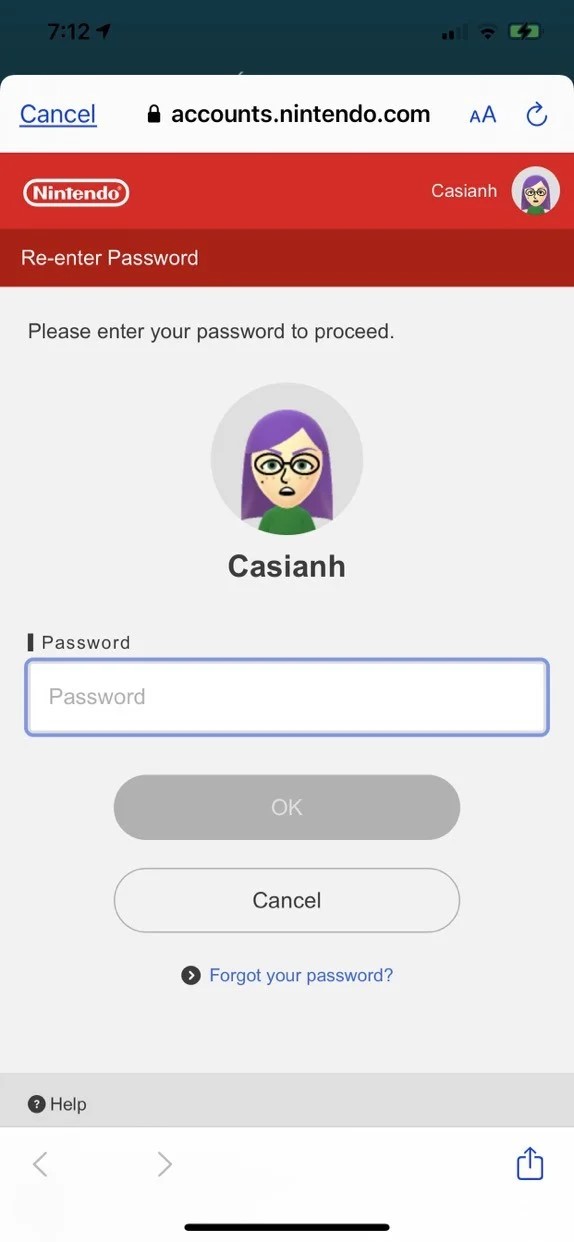
- Click ‘Sign In’ in your Nintendo Account. A pop up will appear asking for permission to sign in to ‘nintendo.com,’ pressing “Continue” will redirect to the website to log in.

- Enter your username and password. Press ‘OK’ to return to the previous screen.
On execution of the above instructions, follow the directions below to move a Pokémon Go creature to Home App:- Open Pokémon Go and access the ‘Main Menu’ by pressing the PokeBall icon.
- Open ‘Settings’ and go to Home.

- Press on ‘Send Pokémon’
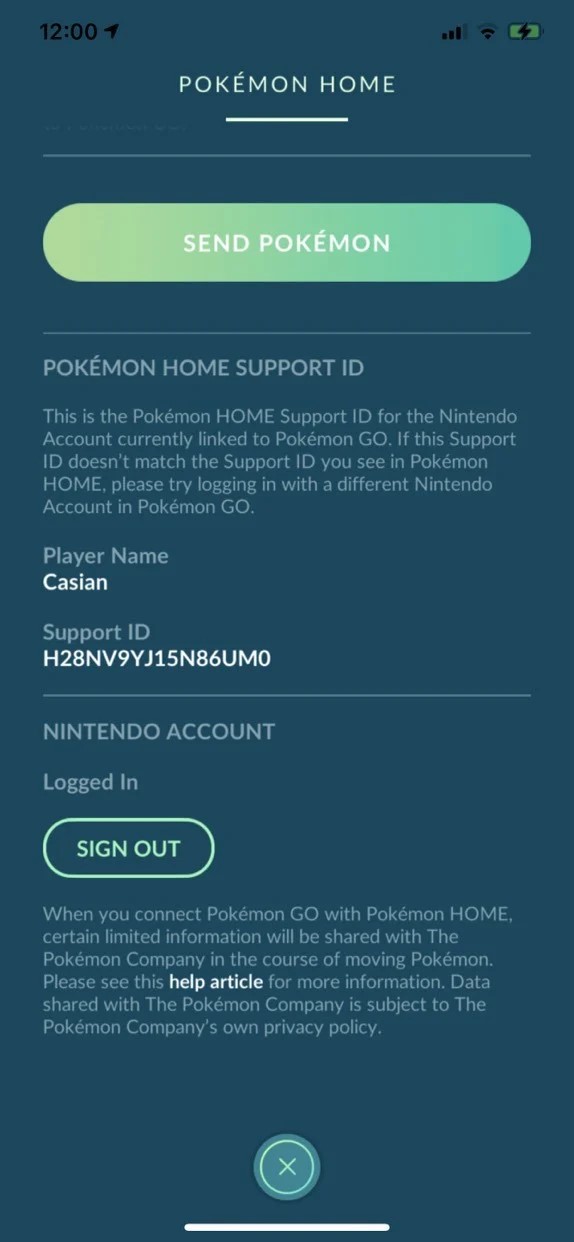
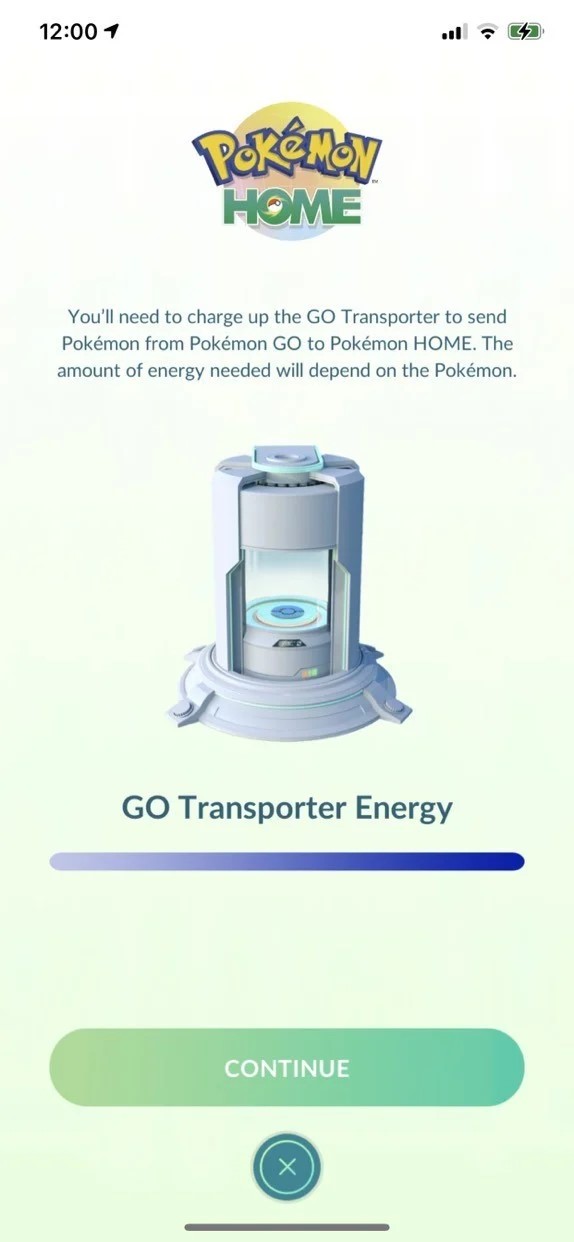
- Press Continue
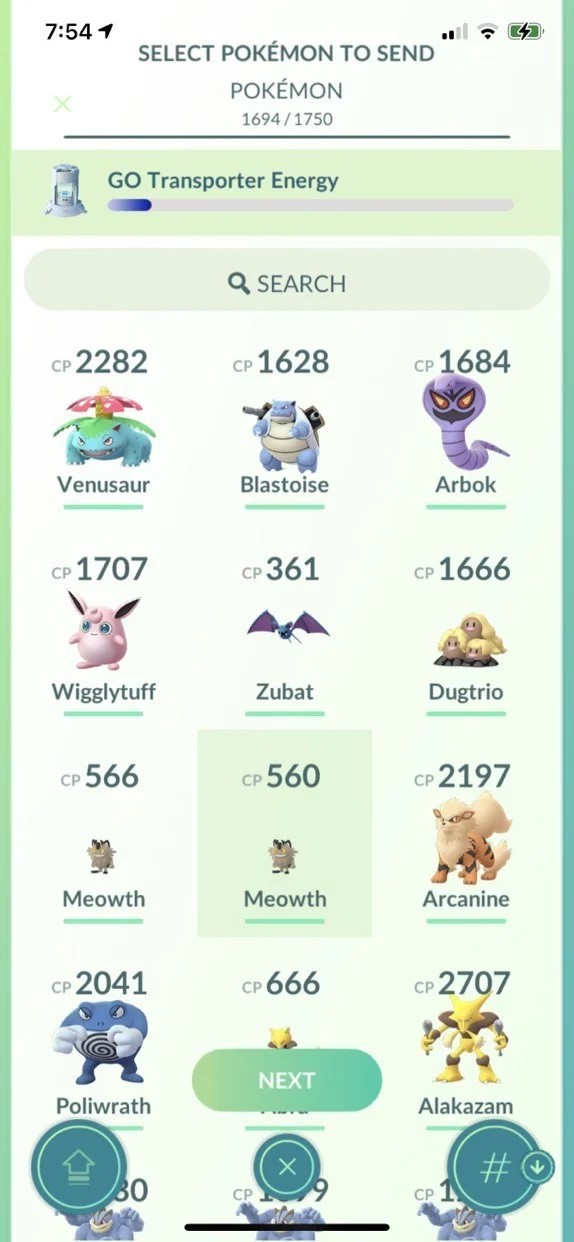
- Select the Pokémon you want to relocate
- Click ‘Next’
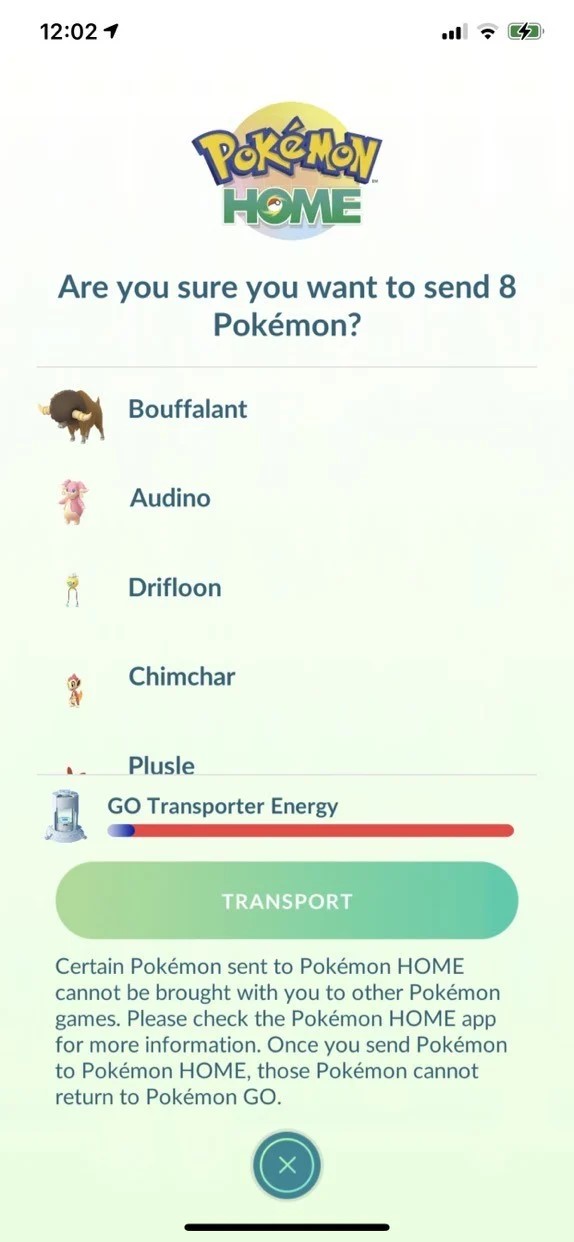
- Tap ‘Transport’ to accept after confirming your pick.
- Press ‘Done’
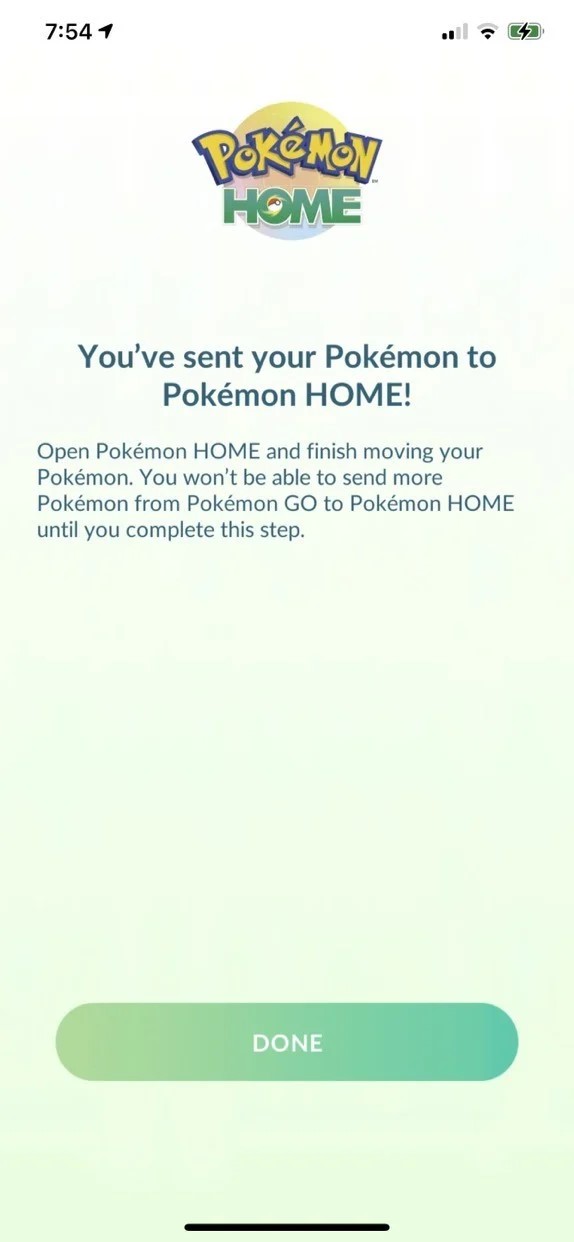
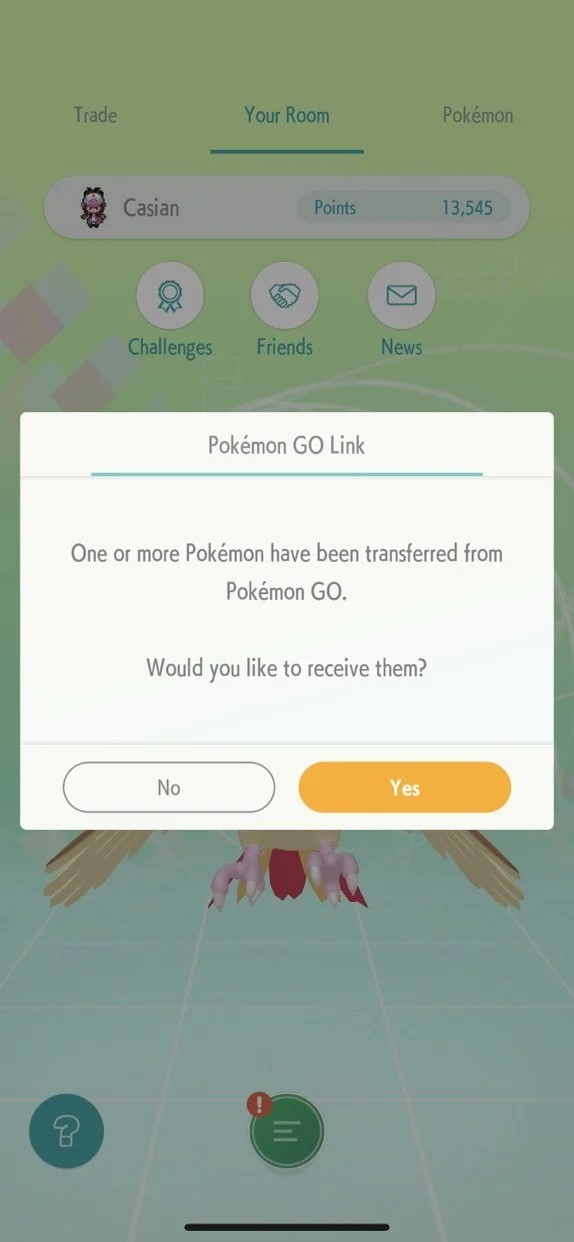
- Open Pokémon Home on mobile.
- Click on the screen to start.

- Click ‘Yes’ on the Pokémon Go Link message.
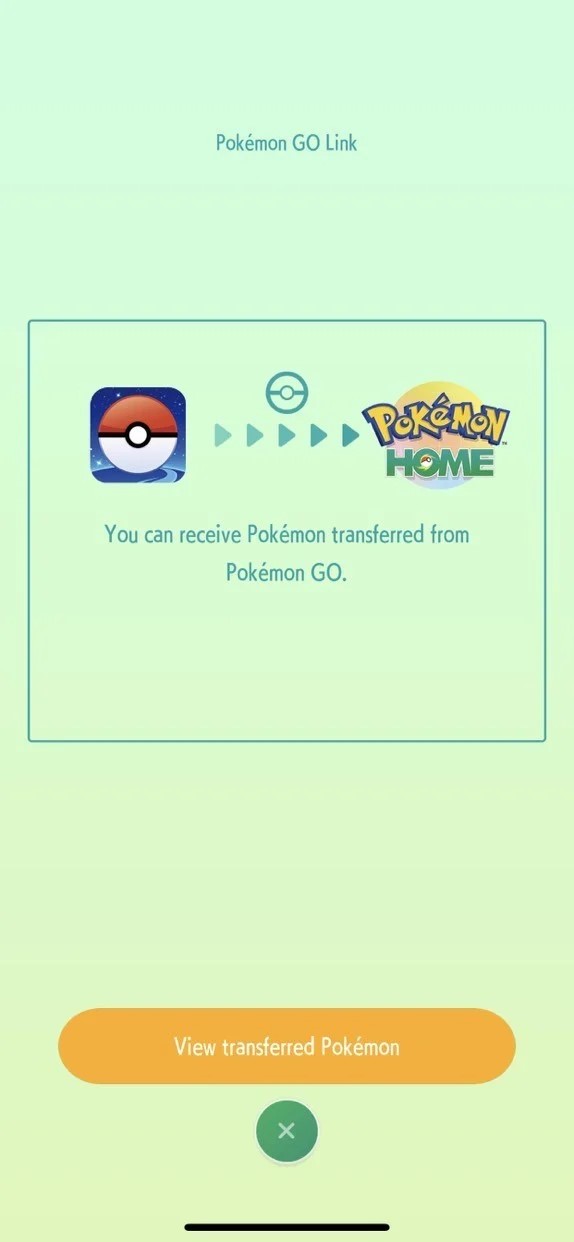
- Select ‘View Transferred Pokémon’
- Confirm that you want to Receive by pressing ‘Receive Pokémon’
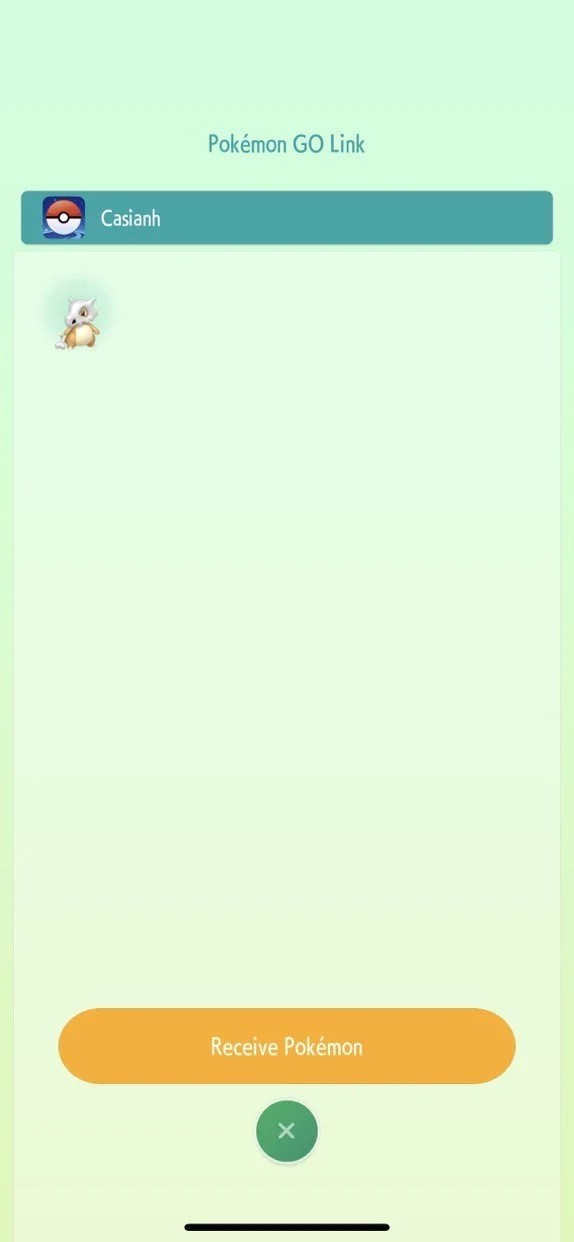
By following the steps above, you will be awarded a Mystery Box in Pokémon Go, and you can activate it by advancing to your item bag.
Use Virtual Location to catch the Pokémon Go creature
You can use the faux location of Dr. Fone to imitate your orientation without making a move and collect exclusive Pokémon. The mock location of Dr.Fone lets you simulate your position and permits your mobile application to presume that you have selected the application interface of Dr.Fone without any restrain or recognition from developers of Pokémon Go. Follow the instructions below to catch Pokémon any place without making any movement.
Step 1: Install:
Install the ‘Dr. Fone toolkit’ from the official website after downloading it. After installation, launch the toolkit and select the ‘Virtual Location’ tab.
Step 2: Connect:
Subsequently, connect your PC or laptop with the Dr. Fone application. Also, permit the location services to retrieve the location of your device. Then, press on the ‘Get Started’ button to use the services of Dr. Fone.
Step 3: Imitate your GPS position:
Select your current location on the map. Next, click the leftmost button on the top-right corner of the window to start the ‘Teleport’ mode. Then search the places you wish to mock your position with, and press ‘Go’ after the selection.

Step 4: Imitate Movement between steps:
To start the simulation, make a movement and traverse to the ‘Move Here’ button to reach multiple times. By default, the motion is adjusted to ‘1’, but it can be replaced by the user to switch the program correspondingly.

The simulated position will emerge as genuine for the Pokémon Go app, and it will believe that you are moving between the two designated positions chosen on the Dr. Fone GUI screen. At the foot of the screen, the motion speed can also be tuned using the sliding menu. This way, you can use the false maneuver of the position of Dr. Virtual Fone without having the need to understand it. Also, your application will not be banned.

Step 5: Movement Simulation between more than two spots:
Dr. Fone’s application also permits you to replicate activity between more than two sites. The component is called after the multi-stop path that can be chosen from the GUI toolbox class positioned at the top-right nook that lets you put numerous specified destinations on the map, and your position will behave appropriately as controlled by the virtual location application of Dr.Fone.
To grant permission to the system to mock movement by picking out the right options, press the ‘March’ button. You will be required to do the Pokémon Go walking illusion at some point. Dr. Fone’s virtual movement imitation application eases your life and lets you do the job without being concerned about travel costs.

Part 2: How to get Shiny Meltan in Pokémon Go?
Meltan is a legendary steel-type Pokémon that was initially launched in Pokémon Go. It is original since each and every other Pokémon has been announced in either the main games or using the Pokémon animation. Meltan has very restricted accessibility and Meltan evolution, Melmetal can yet solely be evolved in Pokémon Go. Until now, there were only two ways of catching Meltan - transferring a Pokémon from Pokémon Go to Pokémon Home or associating your Pokémon Go account to Let’s Go, Pikachu! or Let’s Go, Eevee! Now there is another way of capturing Meltan, that is, by opening a mystery box. You can get a Mystery Box that opens once a week by connecting your ‘Pokémon Go’ and ‘Pokémon Home’ accounts as described earlier.
The Mystery Box will act as an essence precisely for Meltan, attracting a large amount of the small Hex Nut Pokémon to your locality for one hour. It takes time to recharge, about three days, but after it is charged, you have to transfer another Pokémon to HOME to be able to use it again for an hour. If you get to use the Mystery Box in the course of specific events, you can even grab a Shiny Meltan.

Conclusion
Pokémon is one of the most enjoyable games, not only because it yields prizes such as the mystery box Pokémon, Meltan Pokémon, shiny Meltan Pokémon go, but it also develops players’ interest completely. It manifests a 3D view making it appear as the actual life. Furthermore, with an application like Dr. Fone Virtual Location, you turn out to be an addict as it helps you imitate your GPS position and proceed across the path you set up on the map.
Also read:
- [New] 2024 Approved The Comprehensive Cheat Sheet to Mastering Spotify Advertising
- [New] In 2024, The Complete Laptop & Mobile Manual for Old FB Stories
- [Updated] Construct Humor Memes via Adobe
- [Updated] In 2024, Maximizing Zoom Meeting Insight Through Grid View Settings
- 4 Methods to Turn off Life 360 On Vivo Y28 5G without Anyone Knowing | Dr.fone
- Cyberpunk 2077 Performance Boosted – Overcoming Previous FPS Drops
- How and Where to Find a Shiny Stone Pokémon For Apple iPhone 13? | Dr.fone
- How Do You Get Sun Stone Evolutions in Pokémon For Apple iPhone 15 Pro Max? | Dr.fone
- How does the stardust trade cost In pokemon go On Apple iPhone 15 Plus? | Dr.fone
- In 2024, Is Mega Mewtwo The Strongest Pokémon On Apple iPhone 14 Pro? | Dr.fone
- In 2024, Why does the pokemon go battle league not available On Apple iPhone XS | Dr.fone
- Pokemon Go Error 12 Failed to Detect Location On Apple iPhone 14 Plus? | Dr.fone
- Resolving Baldur's Gate 3 Launching Problem on PC/MAC
- Top 15 Augmented Reality Games Like Pokémon GO To Play On Apple iPhone SE | Dr.fone
- Xiaomi Civi 3 Disney 100th Anniversary Edition Bootloop Problem, How to Fix it Without Data Loss | Dr.fone
- Title: How Can I Create My Pokemon Overworld Maps On Apple iPhone XS Max? | Dr.fone
- Author: Iris
- Created at : 2024-11-12 22:27:34
- Updated at : 2024-11-15 00:48:20
- Link: https://ios-pokemon-go.techidaily.com/how-can-i-create-my-pokemon-overworld-maps-on-apple-iphone-xs-max-drfone-by-drfone-virtual-ios/
- License: This work is licensed under CC BY-NC-SA 4.0.