
How does the stardust trade cost In pokemon go On Apple iPhone 6? | Dr.fone
How does the stardust trade cost In pokemon go On Apple iPhone 6?
Pokemon go has been around for a while now and has arisen as one of the most talked-about games in the gaming community. The fact that it is a location-based game and needs you to move around while playing the game makes it further interesting. Trading in Pokemon go is one of the most talked-about features. Today, we will help you explore more about stardust trade costs and how can you easily perform trades! Hang on as we dwell deeper into Pokemon go and trade stardust costs.
Part 1: How does Pokemon trading work?
So as we’ve discussed earlier, Pokemon go trading is one of the most interesting features of the game. So how does this trading work? In Pokemon Go, you can trade pokemon possessed by you with those possessed by your friends if both you and your friend, decide to mutually trade the pokemon with each other! For trading in Pokemon go, there are certain criteria you need to satisfy to qualify for trading in Pokemon go! Given below are the requirements to qualify for trading in Pokemon go
- Be at least level 10
- Be friends with the person you’re trading on Pokemon go
- Be in a radius of 100 m while you’re trading
However, Pokemon go also has levels of friendship and you can trade pokemon of different levels with friends with whom you have different friendship levels. Higher is the friendship level, higher is the level of Pokemon which you can trade. every trade requires you and your partner to spend stardust points. So There are basically 4 levels of friendship in Pokemon go
- Friend
- Good friend
- Ultra friend
- Best friend
The levels of your friendship with a player on Pokemon go increase with the increase in the number of days you stay friends with them. Within a month of friendship, you can become best friends with a player on Pokemon go! You also need stardust points on Pokemon go. So what is stardust trade cost? Before you trade any pokemon you must spend stardust coins. Not having enough stardust trade coins will not allow the trade of pokemon to happen. Hence, you must have enough stardust trade costs.
Part 2: How much stardust do you need in pokemon trading costs?
Trading in Pokemon go is quite complex. This is because the needed Stardust points will be different in every case and will depend on several factors. Factors such as whether you already half got that Pokemon in your pokedesk or not, the friendship level of you and your friend who are interested in trading, or whether the Pokemon is rare or common. Given below are the Stardust trade costs for each Pokemon.
Standard trades
- Good friend:100
- Great friends:80
- Ultra Friends: 8
- Best friend: 4
Shiny or legendary (caught by you)
- Good Friend: 20,000
- Great Friend: 16,000
- Ultra Friend: 1,600
- Best Friend: 800
Shiny or Legendary (not caught by you)
- Good Friend: 1,000,000
- Great Friend: 800,000
- Ultra Friend: 80,000
- Best Friend: 40,000
However, this Stardust trade cost may vary according to the friendship levels! Before trading, you must think of the friendship level between you and your friend and also if the Pokemon which has been traded can be evolved through trading. Evolving Pokemon through trading is another beneficial tactic that could benefit you as a player of Pokemon go.
Part 3: Ways to increase stardust in pokemon go?
1. Use Dr.Fone – Virtual Location (iOS/Android)
Do you want to increase your Stardust trade cost in Pokemon go? There is no better way for doing so other than using Dr.Fone - Virtual location (iOS/Android) . Using this will easily help you to catch more Pokemon, as you can fake your location using this app. You can change your location to any given location on the map and catch Pokemons from different regions without having to move around. Doesn’t it sound fun? Catching the rarest Pokemon all by sitting at home!
Teleport to anywhere in the world
Step 1: Firstly, you need to install Dr.Fone- Virtual location (iOS/Android) on your computer(Win/Mac). Then, install and launch the program on your computer. Click on “Virtual Location” from the options on the main interface.


Step 2: Now, you need to connect your Apple iPhone 6 to the PC and click on “Get Started”.

Step 3: A new window would now pop up where you can see your current location. If you are unable to see your current location, then click on “center on” icon at the bottom. Doing so will lead you to show your location on the map.

Step 4: Now click on “Teleport mode” using the button on the top right corner of the window. Enter the place you want your location to be set to and then click on “Go”. Once done the click on “Move Here”. Well, that’s it! We’re done with changing our location to the desired location!

2. Exchange the gift with friends to level up a friendship
Pokemon go also allows you to send gifts to your game friends and receive gifts from your game friends. Well, this can help both of you grow and progress in the game and can be a helpful trick to increase Stardust!
3. Play the game as much as you can
Investing more and more time on the game will lead you to catching more pokemons which will, in turn, lead to getting more stardust! Hence play it regularly with continuity!
Conclusion
Well, the article did give us a lot of idea about stardust trade cost and how to increase Stardust trade points in Pokemon go. We dwelled more into major facts about the game and learned a lot about it. We also explored what is drfone-Virtual location (iOS) and how it can help you to teleport from one place to another! Using the app will help you a lot in improving the game and wouldn’t require you to do much! All you’ve to do is teleport from one place to another, catch more and more pokemons and get more stardust! As a player, it shall improve your stats by a huge margin!
Preparation to Beat Giovani in Pokemon Go For Apple iPhone 6
Are you ready to defeat Giovani effortlessly in Pokemon Go? Keep reading.
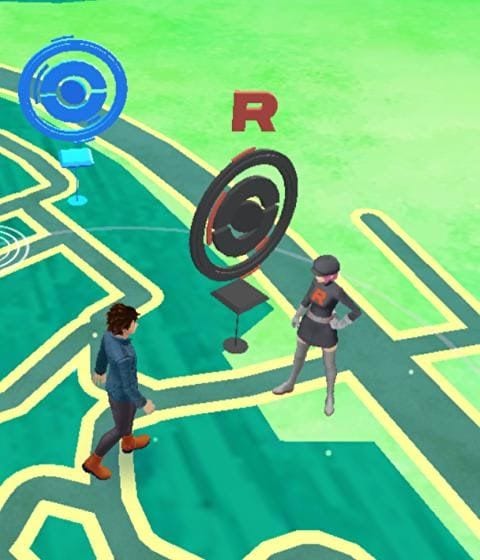
Giovani is the grand commander of the Team Go Rocket crime syndicate. The big boss appears stronger every month as he also changes his lineup of creatures monthly. This means your lineup of Pokemon Go Giovani counters would have to change subsequently. So how do you know the best Giovani Pokemon Go counters to use against the Team Go Rocket boss when next you meet him? Well, that’s left for this guide to answer. Here you will learn about how to defeat this monster and how to find him. Without wasting your time, let’s start with how to find Giovani in Pokemon.
Part 1. How to Find the Giovani in Pokemon
Locating Giovani’s hideout is never a walk in the park as you need to complete some daunting tasks. A detailed explanation of each task is given below:
1. A Troubling Situation Task
This four-step storyline Special Research task introduces players to the Team Go Rocket Invasion and Shadow Pokemon feature in the Pokemon Go game. Players leverage the task to learn how to stop the Team Go Rocket crime syndicate by reclaiming PokeStop and then purifying Shadow Pokemon.
How to Complete ’A Troubling Situation’ Task in Pokemon Go Giovani
Below you will find all the four steps you need to complete in the ‘A Troubling Situation’ task with their rewards:
Pokemon Go: A Troubling Situation Step 1
This step should be completed with ease since you aren’t new to the Giovani Pokemon Go game. Just evolve any two Pokemon that you own and then charge them up five times. And boom! You are done with this step.
Reward: 1,000 Stardust and 2,000 XP
Pokemon Go: A Troubling Situation Step 2
For this step, you have to catch two shadow Pokemon which can be achieved by defeating two Grunts from Team Go Rocket. On killing them, they will leave some shadow Pokemon behind which you have to catch. After that, go ahead and defeat the last Grunt to complete this step.
Reward: 2,000 Stardust, 2,000 XP, and 5 Golden Razz Berries
Pokemon Go: A Troubling Situation Step 3
After catching the shadow Pokemon in step 2, you need to catch one more to cleanse or purify the three of them. To do this, just tap on your shadow Pokemon, and then hit the Purify option. You will be charged some thousands of Stardust and a couple of candy for the shadow Pokemon.
Rewards: 2000 Stardust, 5 Silver Pinap Berries, and 1 Rare Candy
Pokemon Go: A Troubling Situation Step 4
For this step, you’ve got nothing to do. All three objectives have been automatically completed for you when you finished the previous step. You only get rewards at this final step.
Rewards: One Fast TM, One Charged TM, and 3 Rare Candies
2. Giovani Special Research Task

After completing the quest above, Giovani Special Research or Looming in the Shadows is the next and final quest you have to complete to face Giovani. It’s a six-step Special Research that introduces the Team Go Rocket Grunts and Leaders: Cliff, Arlo, and Sierra.
On completing one research step, you will be given a reward called the Super Rocket Radar. Like the Rocket Radar, the Super Rocket Radar can be equipped and unequipped from your Bag. This reward doesn’t only show Giovani’s hideout, it also shows some of his Grunts hideouts.
Part 2. What does the Pokemon Go Giovani Counter Contain?
Giovani remains the toughest beast amongst all the Team Go Rocket Leaders. When you find him in the game, be prepared to face his wrath. To defeat him, you need a powerful team.
The big boss choice of legendary Shadow Pokemon and second party members changes every month- the Pokemon you fought against the previous month will be different from that of the present month and thereafter.
Giovani’s lineup of creatures for October 2022 is shown below:
| Lineup of Creature | Pokemon |
|---|---|
| First | Persian |
| Second | Kangashkan, Nidoking, Garchomp |
| Third | Mewtwo |
For the Pokemon, Persian, and Kangashkan, try to have a Lucario, Conkeldurr, or Machamp in your team and you are good to defeat them.
When you encounter Nidoking or Garchomp, your team has to change. You will need to have a strong ice-type Pokemon on your team. The reason is that this new Lineup of creatures is strong on land and could cause substantial damage to the dragon-type Pokemon in case you wanna choose them.
Picking any of these great ice-type Pokemon, Mamoswine, Glaceon, or Weavile when you face Nidoking or Garchomp is a perfect choice. However, we recommend Mamoswine, because he isn’t just an ice-type Pokemon but also a strong ground-type Pokemon.
Once you defeat Team Go Rocket’s second lineup creatures, you will have to battle against the legendary psychic Pokemon, Mewtwo, who is weak to this set of Pokemon; bug, ghost, and Dark-type Pokemon. So beating this Pokemon Go Giovani grunt shouldn’t be a tedious task as you’ve got a plethora of choices when deciding the Pokemon-type to use. Origin Giratina and Tyranitar are some strong Dark-type Pokemon you can use to defeat Mewtwo.
Now you know the best Giovani Pokemon Go counters to use against each lineup of creatures, leverage it to advance to the next phase of the game where you will face the big bad boss himself, Giovani.
Part 3. Tips to Beat Giovani in Pokemon Go

Just as you did against Team Go Rocket Leaders, Arlo, Cliff, and Sierra, you need a Pokemon stronger than two of Giovani’s. With that, you can use the same Pokemon twice, thereby keeping your choice for Legendary Shadow Pokemon safe till you need it to beat Giovani.
Mind you, the big bad boss, Giovani has two Protect Shields at his disposal so you have to be careful while fighting against the monster. We implore you to start your game with a Pokemon that has a Charged move so you can charge as fast as possible.
Getting a strong Pokemon won’t come with ease, however, with the use of Dr.Fone- Virtual Location you can achieve this. The handy software is designed to help you spoof your iOS device location so you can catch any strong Pokemon of your choice remotely.
Key Features
- With just a single click you can spoof your Apple iPhone 6 GPS location
- The application allows you to simulate GPS movement at your comfort
- It saves your location automatically in the database
- Provides full-screen HD map view
- Easily enter your target location name, address, or the exact coordinate on the application with a joystick
Guide to Use Dr.fone Virtual Location to Get Stronger Pokemon in Giovanni Pokemon Go
Step 1: Firstly, you have to download and install a compatible version of Wondershare drfone virtual location on your PC. Wait for the installation to complete, then run the application.
Step 2: The interface above will appear on your screen. With the aid of a lightning cable, connect your Apple iPhone 6 to a PC, then click on the Virtual Location icon. A new interface will pop up as shown in the image below
Click on Get Started to change your location.
Step 3: Your current location will appear on the PC screen. Switch location by entering the name or address of the place in the field at the upper left corner of the application.

Step 4: The interface below will pop up on your screen. Click on the Move Here icon to teleport to your chosen location.
And now you are good to have one of the strongest Pokemon on your team when fighting against Giovani. Leverage the Dr.Fone- Virtual Location program as it will help you ease the stress of catching stronger Pokemon remotely on your device without jailbreaking it.
Detailed guide of ispoofer for pogo installation On Apple iPhone 6
Pokemon Go is Niantic’s most successful game that has taken the world by storm. Players get to be a part of the various regions of the Pokemon has now become one with our world. The game requires you to travel to different locations to complete researches, catch Pokemon, defend gyms, and most importantly, complete the Pokedex given by Professor Willow. Niantic’s games are designed to be played with others outdoors. This feature ends up giving players in some parts of the world advantage over others. This is specially to catch regional Pokemon and during ticketed events and sponsored events. Spoofers can avoid the barriers of distance and play anywhere in the world by iSpoofer for pogo installation and other such apps. Niantic, however, does not allow this and considers it the same as hacking. Players who were looking to play and access all the features of the game available all across the world.
Part 1: Will the iSpoofer back on 2020?
iSpoofer has been shut down. All its applications, websites, and other related services have been terminated. iSpoofer for pogo installation does not exist. If any website claims to give access to the application or iSpoofer direct download, it is fake. Also, the new Pokemon Go application version which is 0.195.0 has been updated to detect applications like iSpoofer, so on being detected, it may lead to a warning, or a permanent ban as well. And we don’t see the certainty to get it back soon.
Part 2: Detailed guide of iSpoofer for pogo installation
This detailed guide for iSpoofer installation is for those who still possess the older version of the app that works in an older iOS version.
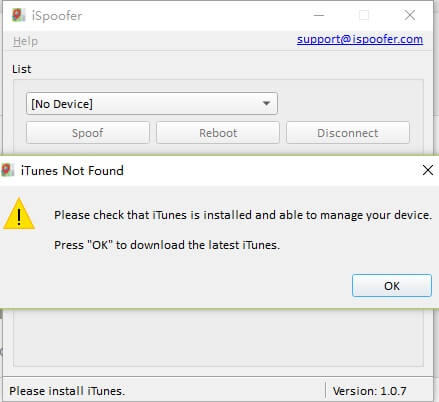
Step 1 – Install the setup for iSpoofer on your computer if you had got it using. This requires the latest version of iTunes, so make sure that you have it installed.
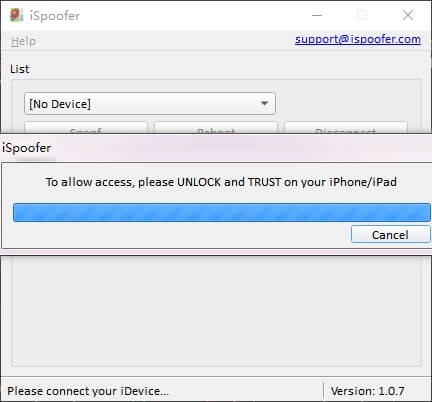
Step 2 – Once the setup is done, connect your phone to the computer and unlock it. You will have to select the “TRUST” option for the software to do its work. On selecting this option, iSpoofer will download a developer file that will spoof the location.
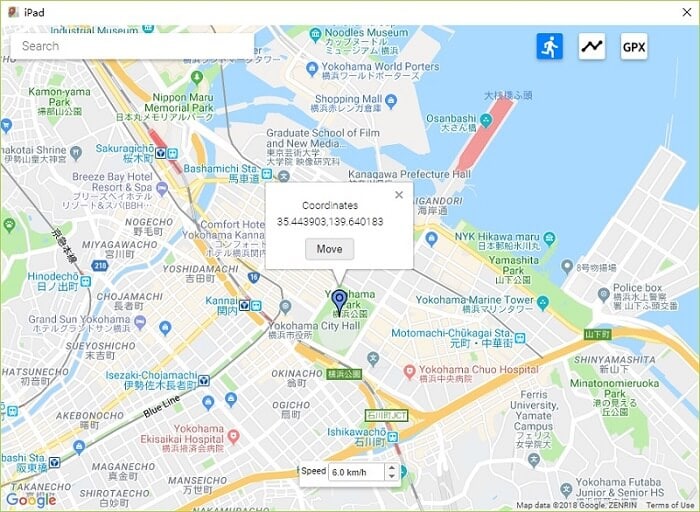
Step 3 – A map will load on your computer screen, which allows you to enter or point the location. Enter the location of your choice and click on “MOVE”. And that is it! Three simple steps and you have spoofed!
Part 3: How to use the iSpoofer when you play pokemon
Follow the tutorial above for ispoofer for pogo installation. A mock location has now been added to your device that makes iOS believe that you are at the entered spot.

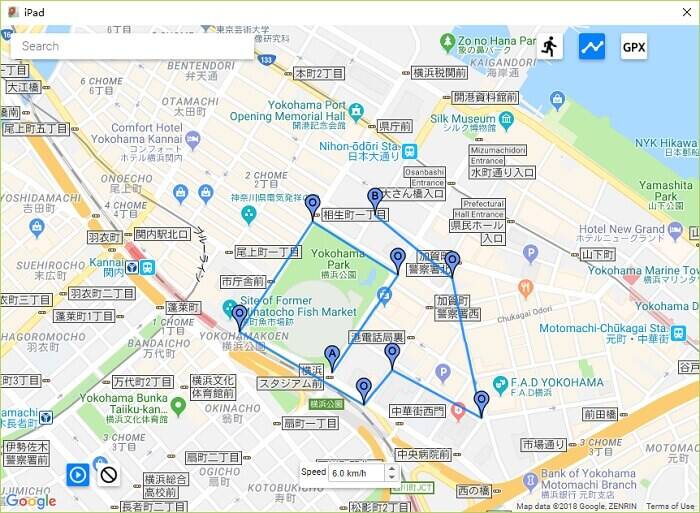
Following these steps, disconnect your phone and launch Pokemon Go. From here you can either use the joystick to move around or use a “.gpx” file to add a preset route for you to move around. That would look like this -
iSpoofer for pogo installation has the following disadvantages -
- The application cannot work without iTunes and is very dependent on it.
- Niantic can easily detect spoofing through this app and may lead to a ban.
- Movement simulations are hard and unnatural, making it more susceptible to a ban.
- Configurations and settings require some technical knowledge in to troubleshoot any errors.
- The app is prone to crashing a lot. The interface sometimes cannot handle the constant change of locations.
All these issues are overcome with great detail by Dr. Fone Virtual Location (iOS) by Wondershare.
Part 4: Safer tool to spoof pokemon- drfone virtual location
Pokemon Go Spoofers using iOS need not depend on iSpoofer for jumping locations. Dr. Fone Virtual Location by Wondershare is the new, safer app to spoof in Pokemon Go. The app uses mock location services to help you teleport to anywhere across the world. This also allows you to be safe from the detection software in Pokemon Go.
What are the benefits of using Dr. Fone Virtual Location?
- It provides a mock location and location changer – With just a single click, the application can change your location to where you want to. All apps on your phone will start recognizing this location.
- It enables you to move at different speeds - It has 3 different speeds, namely walking, cycling, and driving that helps you travel faster or log in kilometers too.
- The joystick allows movement – You can use the joystick to move your character around the map to navigate to Pokestops or rare wild spawns easily.
- The map view gives a 360o view – By scrolling around the screen, you can get to see all the routes around you and plan accordingly.
- Auto-walk feature - The game has an auto-walk feature in case you do not want to use the joystick to move around manually.
- Keyboard movement commands – The player can also use the A, S, W and D keys on the keyboard to move around
Step by Step Guide to Install and use Dr. Fone Virtual Location -
Step 1 - Download the Dr. Fone Virtual Location by official Wondershare website. Connect your phone to the computer in to execute the changes. Click on the “Virtual Location” option.
Step 2 – Now, on the next screen, you will see “Get Started” option. Click on it to proceed.
Step 3 – The screen will now show a map with your current location on it. In case the location is incorrect, click on the “Center On” button at the bottom-right side of your screen.
Step 4 – Select the “teleport” option by clicking on the icon on the top right corner. Then, in the text box, enter the city or the location’s exact name or the coordinates in the “latitude, longitude” format.
Step 5 – After entering your location, select the “GO” option.
Step 6 – The app will show you an option that says “Move Here”. Click on it, and now you have successfully spoofed to your location of choice.
Your spoofed location is now the default location of your phone, and all the apps will recognize it. The maps app on your phone looks like this –

The teleportation is now complete. Enjoy playing the game with no lags or errors.
Alert
While spoofing between two distant locations give the required amount of time for the cooldown timer to reach zero. If you decide to spoof too quickly, you will automatically trigger a soft ban, and you will not be able to play most parts of the game like catching Pokemon or spinning Pokestops. If this occurs consistently over multiple occasions, it will trigger Niantic’s warning and may end up getting a permanent ban. It has a 3-strike policy. 3 warnings are given before the account is permanently deleted.
The notice looks like this -

The cool-down period between two locations is based on distance and you can refer to the table below to understand the time you need to wait before logging in again.
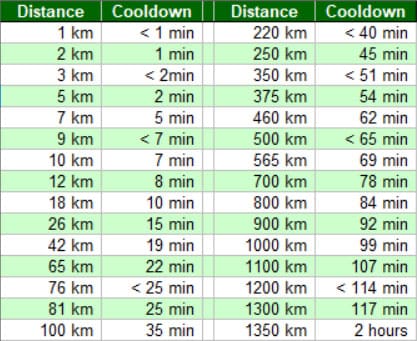
Most gamers wait for the standard 2 hours before logging in again. This gives them access to all the game’s features like before.
Conclusion
We hope that this article has been informative, about Dr Fone Virtual Location and ispoofer for pogo installation. You can now spoof locations with ease by using Dr.Fone - Virtual Location app. Vigilance is needed, and spoofing must be done by following all rules of cool down. This would prevent you from being caught by Niantic, and by Officer Jenny. We would like you to enjoy the game throughout without having to lose any of your levels and Pokemon.
Also read:
- [New] 2024 Approved Master iPhone Selfies Naturally 10 Best No-Cost Enhancing Apps
- [Updated] 2024 Approved Dynamic Designs Mastering Motion Blur in Adobe AI Creations
- [Updated] Determining the Perfect Orientation for FB Videos for 2024
- 2024 Approved Guide to Podcast Cover Design 10 Core Insights
- 2024 Approved ProHero vs Nikkor KM-170 Which Reigns Supreme?
- Apple's Latest Update: Exploring Enhancements in the New AirPods Pro Genesis - A Comprehveiw
- Fixes for Apps Keep Crashing on OnePlus Nord N30 5G | Dr.fone
- How Do You Get Sun Stone Evolutions in Pokémon For Apple iPhone 13 mini? | Dr.fone
- How Do You Get Sun Stone Evolutions in Pokémon For Apple iPhone 15 Plus? | Dr.fone
- How to get the dragon scale and evolution-enabled pokemon On Apple iPhone X? | Dr.fone
- How to Unlock Nubia Red Magic 8S Pro+ Phone without Google Account?
- In 2024, 9 Mind-Blowing Tricks to Hatch Eggs in Pokemon Go Without Walking On Apple iPhone 11 Pro | Dr.fone
- In 2024, Detailed guide of ispoofer for pogo installation On Apple iPhone 15 Plus | Dr.fone
- In 2024, How to Fix Pokemon Go Route Not Working On Apple iPhone 11 Pro Max? | Dr.fone
- In 2024, Pokemon Go Error 12 Failed to Detect Location On Apple iPhone 14 Pro? | Dr.fone
- Planning to Use a Pokemon Go Joystick on Apple iPhone 11 Pro? | Dr.fone
- Social Media Success: How to Swiftly Score More Likes and Followers on Instagram
- Title: How does the stardust trade cost In pokemon go On Apple iPhone 6? | Dr.fone
- Author: Iris
- Created at : 2024-11-08 21:47:22
- Updated at : 2024-11-15 00:57:35
- Link: https://ios-pokemon-go.techidaily.com/how-does-the-stardust-trade-cost-in-pokemon-go-on-apple-iphone-6-drfone-by-drfone-virtual-ios/
- License: This work is licensed under CC BY-NC-SA 4.0.